Cloudflare runs at massive scale and sits close to most of the internet, which makes it a natural place to inspect prompts. It can already catch injection, PII, and unsafe topics, so the detection engine is there. At the time of writing this, one thing it does not offer is an out-of-band verdict, an endpoint your own gateway can call to ask if a prompt is safe. Every path inspects inline, tied to the traffic flow. So I built a small proof of concept on Cloudflare’s own primitives to see what a native version of an out-of-band Cloudflare AI firewall might look like.
Cloudflare AI Gateway competes with Kong AI and LiteLLM. But an out-of-band firewall complements any gateway, not replaces it. That opens the market to every company that already has one.
What is an AI firewall
An AI firewall inspects prompts and responses in real time. It catches injection, jailbreaks, and PII leakage before they reach your LLM. Out-of-band means you call it as a separate API, off to the side of your model path. You send it a prompt, it sends back a verdict. That is the whole idea, and it is what lets you protect any gateway, not just traffic routed through Cloudflare.
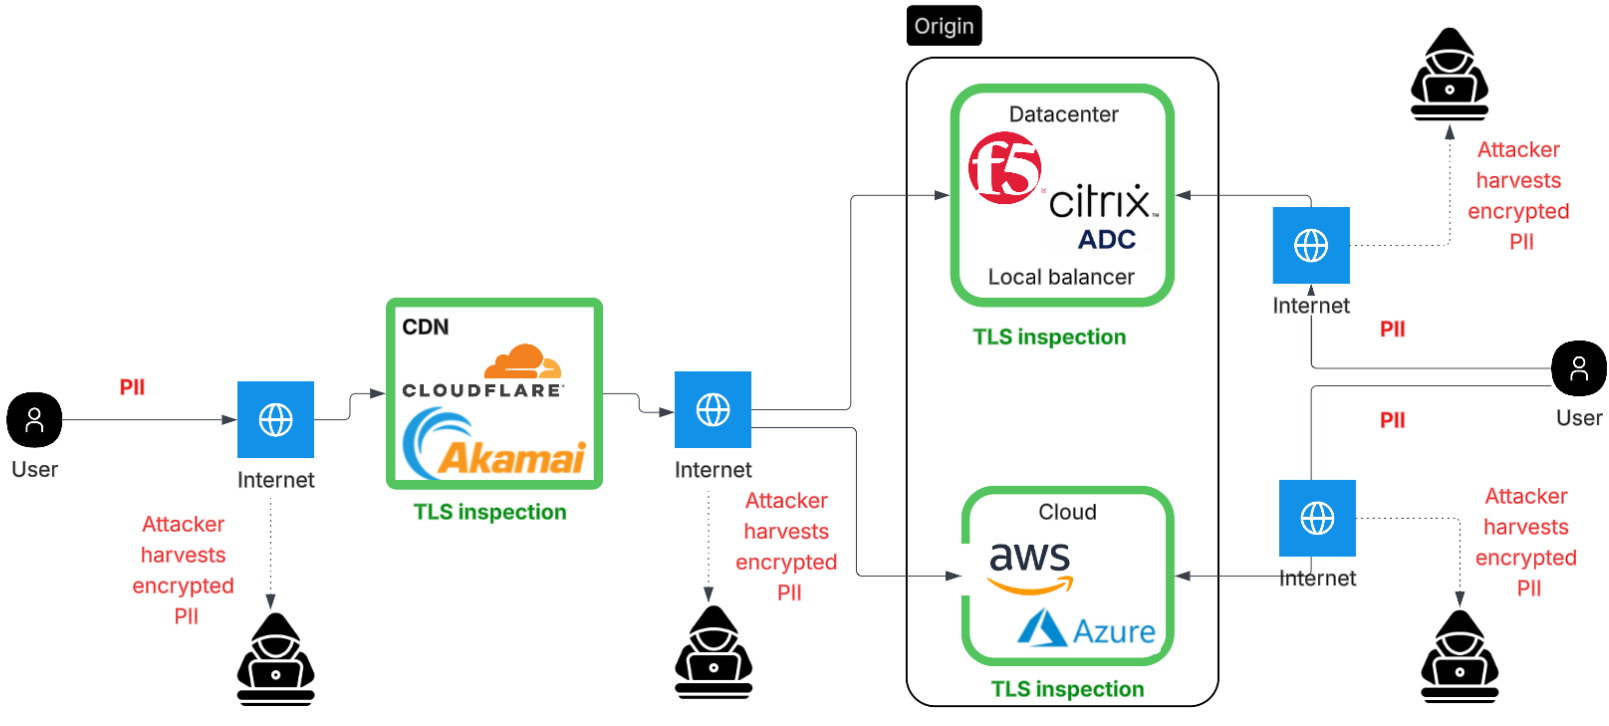
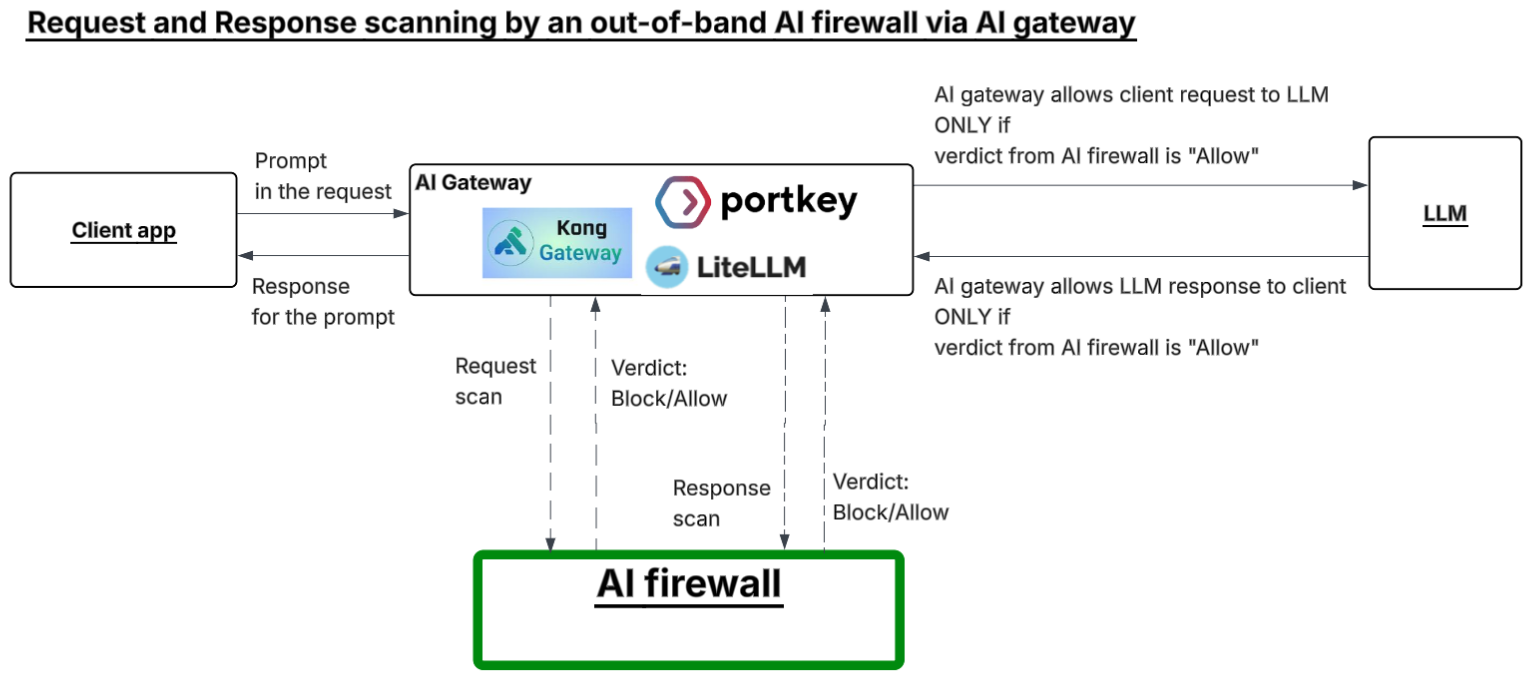
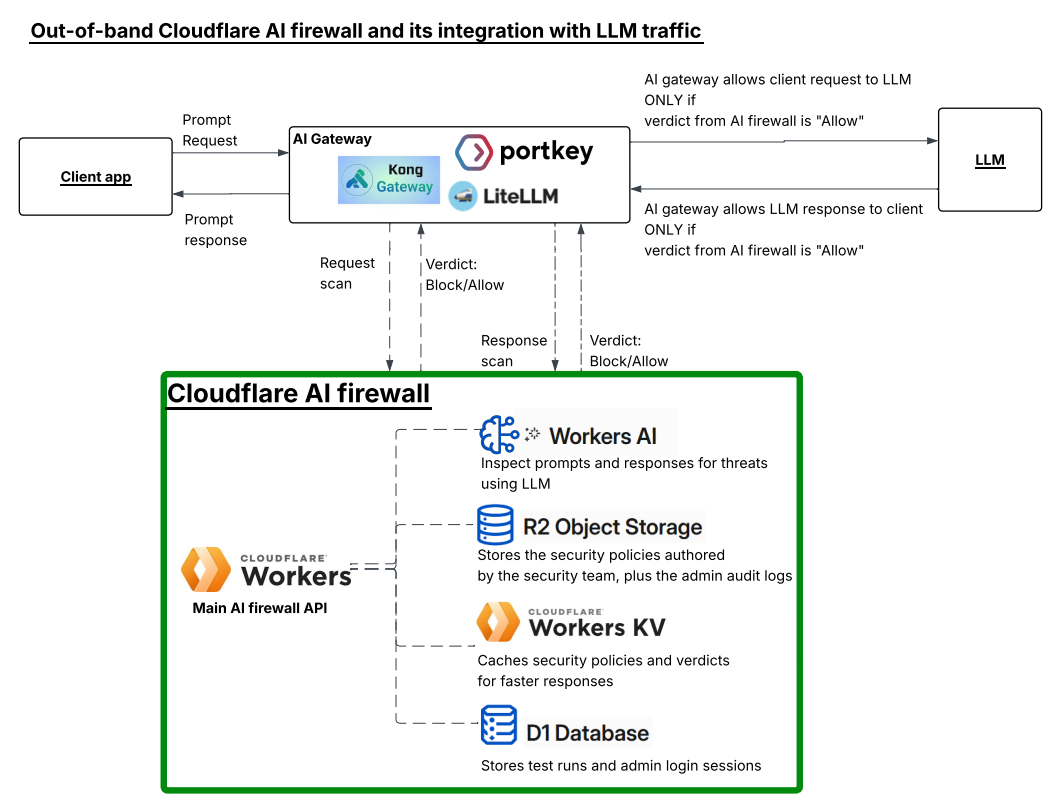
The diagram shows how it fits. Your model access still runs through your existing AI gateway, whether that is Kong, Portkey, LiteLLM, or whatever you already have. But before a prompt reaches the LLM, the gateway sends it to the AI firewall for a scan. The LLM’s response gets scanned the same way on the way back.
The key part is that the firewall is not inline. It does not sit in the traffic path and it does not block anything itself. It just returns a verdict, Blocked or Allowed, and the gateway enforces it. If the request is allowed and the response is allowed, traffic flows. If either one is flagged, the gateway stops it.
Where Cloudflare’s AI security sits today
While learning about AI firewalls in general, I really wanted to leverage Cloudflare because of its massive scalability and ability to handle traffic. It runs one of the largest networks in the world, within 50 milliseconds of most of the planet, which makes it an ideal place to run security inspection close to the request.
Cloudflare has three things that sound like they cover it. None of them quite do.
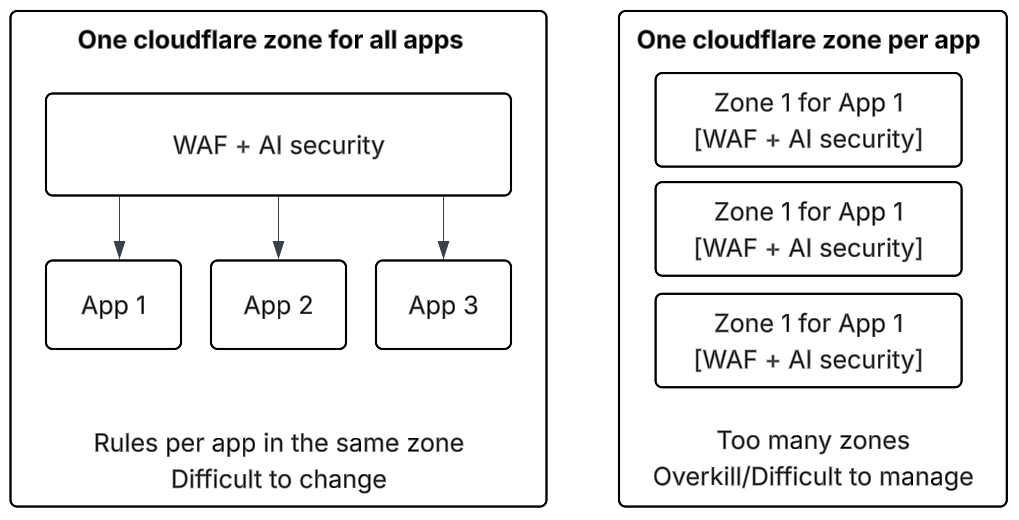
AI Security for Apps AI Security for Apps lives in the WAF. The WAF binds to a zone, which is a domain. Policy is per zone, not per app. So you either share one policy across every app, or you spin up a zone per app and manage all of them.
https://developers.cloudflare.com/waf/detections/ai-security-for-apps/
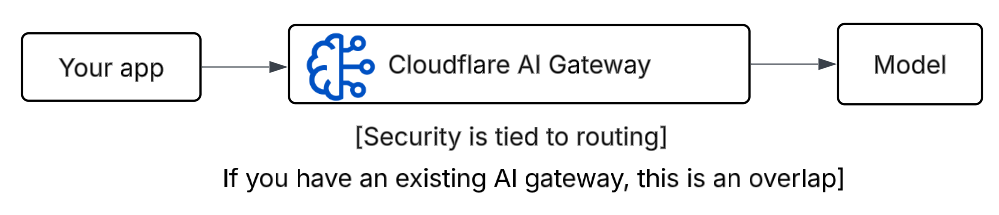
AI Gateway AI Gateway inspects only what you route through it. It is an inline hop, the same shape as Kong, LiteLLM, or Portkey. If you already run one of those, the Cloudflare gateway competes for that slot.
https://www.cloudflare.com/products/ai-gateway
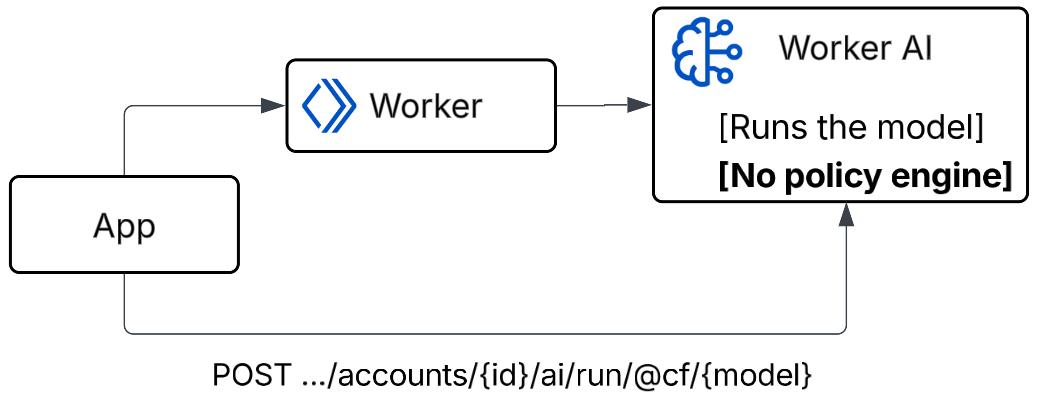
Workers AI just runs a model at the edge. But there is no inbuilt policy engine to inspect the prompt and hence verdict.
https://www.cloudflare.com/products/workers-ai/
All three assume the same thing: your AI traffic already flows through Cloudflare on its way to the model. But if you already run a gateway like Kong, Portkey, or LiteLLM, that is where you want to enforce the decision, and none of these can give you a verdict to enforce.
That is the gap. There is nothing in Cloudflare’s stack you can point your gateway at and ask, is this prompt safe?
Should you build your own AI firewall?
It’s always a build vs buy decision. I would argue in this case.you should buy, because it’s somebody else’s responsibility…
Why did I built this AI firewall then?
To demonstrate Cloudflare could build one too with their own infra components.
Also, becuase I can. 🙂
What did I build
So I built the missing piece, entirely on Cloudflare’s own primitives, to show the platform already has everything it needs.
It is three Workers:
firewall-api is the inspection endpoint. You send it a prompt with an API key, it runs the detection pipeline, and it returns a verdict. This is the out-of-band API your gateway calls.
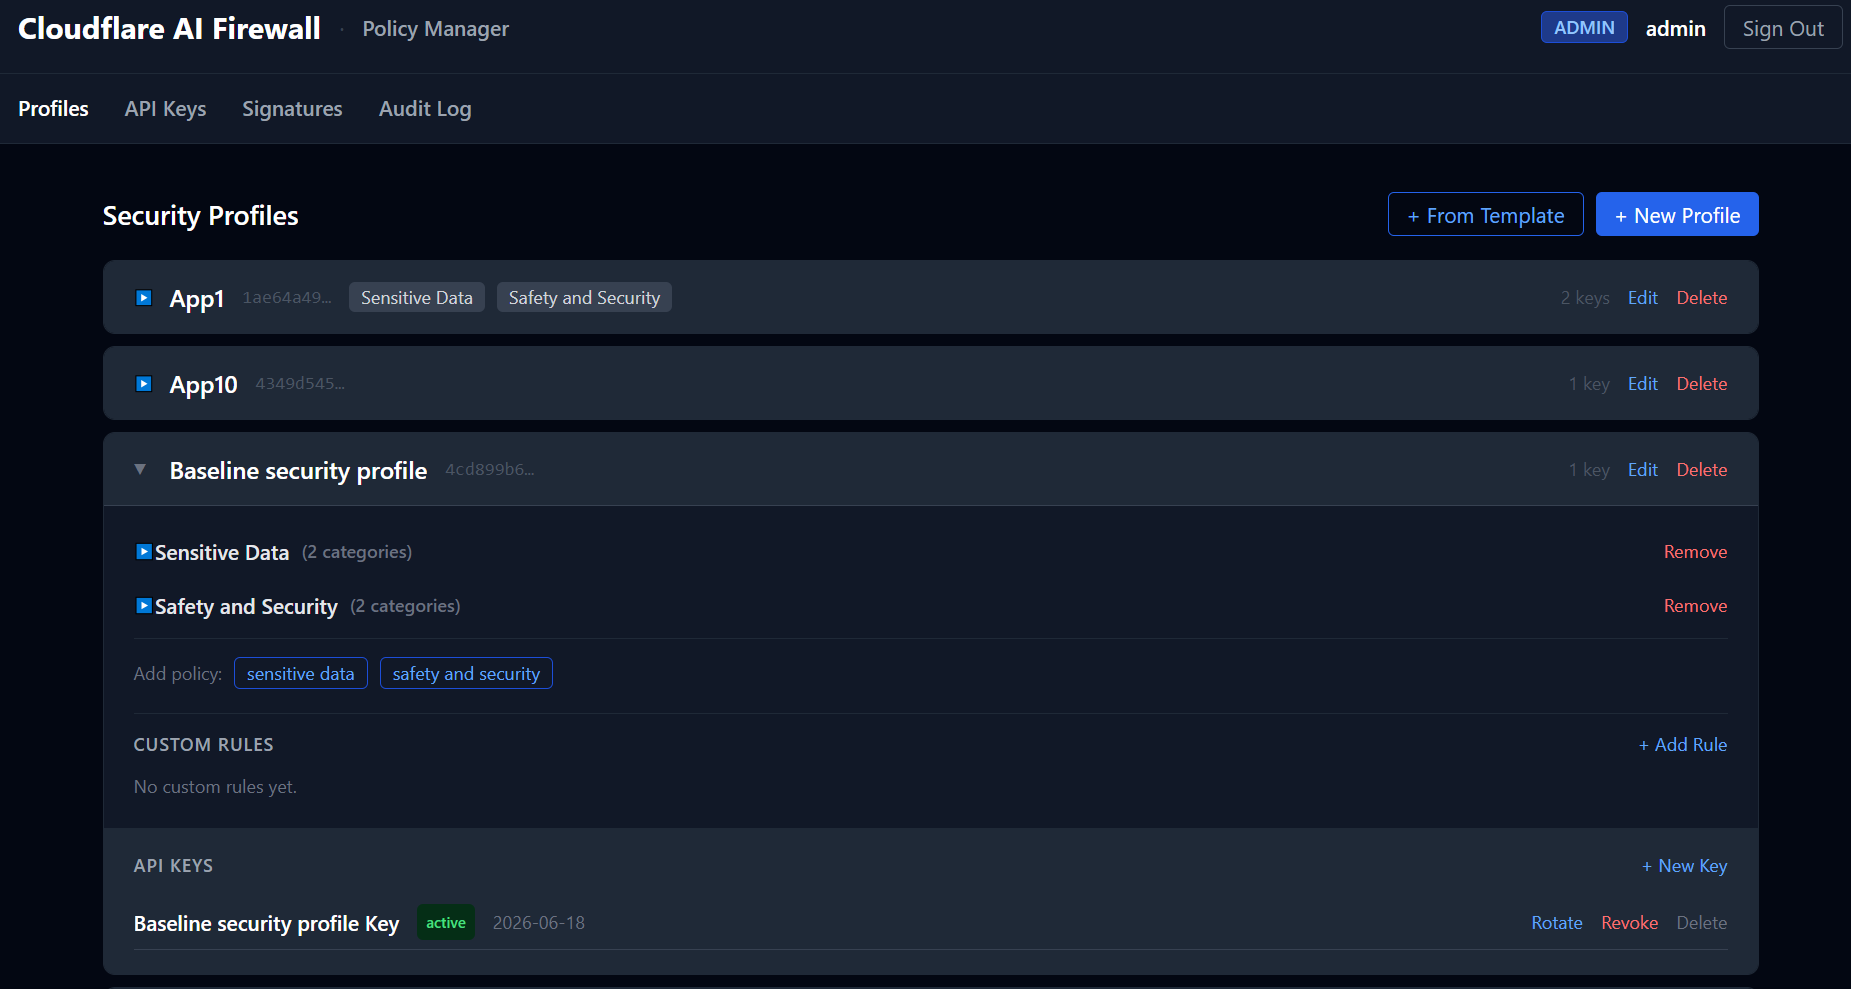
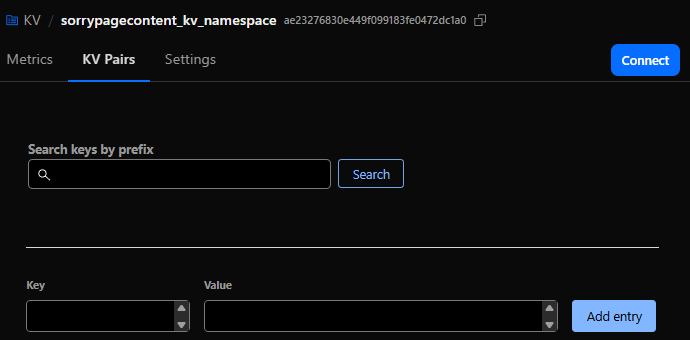
policy-manager is the admin side. A REST API and UI for managing security profiles, API keys, and attack signatures. This is where you decide what each tenant’s firewall actually checks for.
firewall-tester is a test runner. A UI that fires curated prompt sets at the firewall and charts the results, so you can see what passes, what gets blocked, and why.
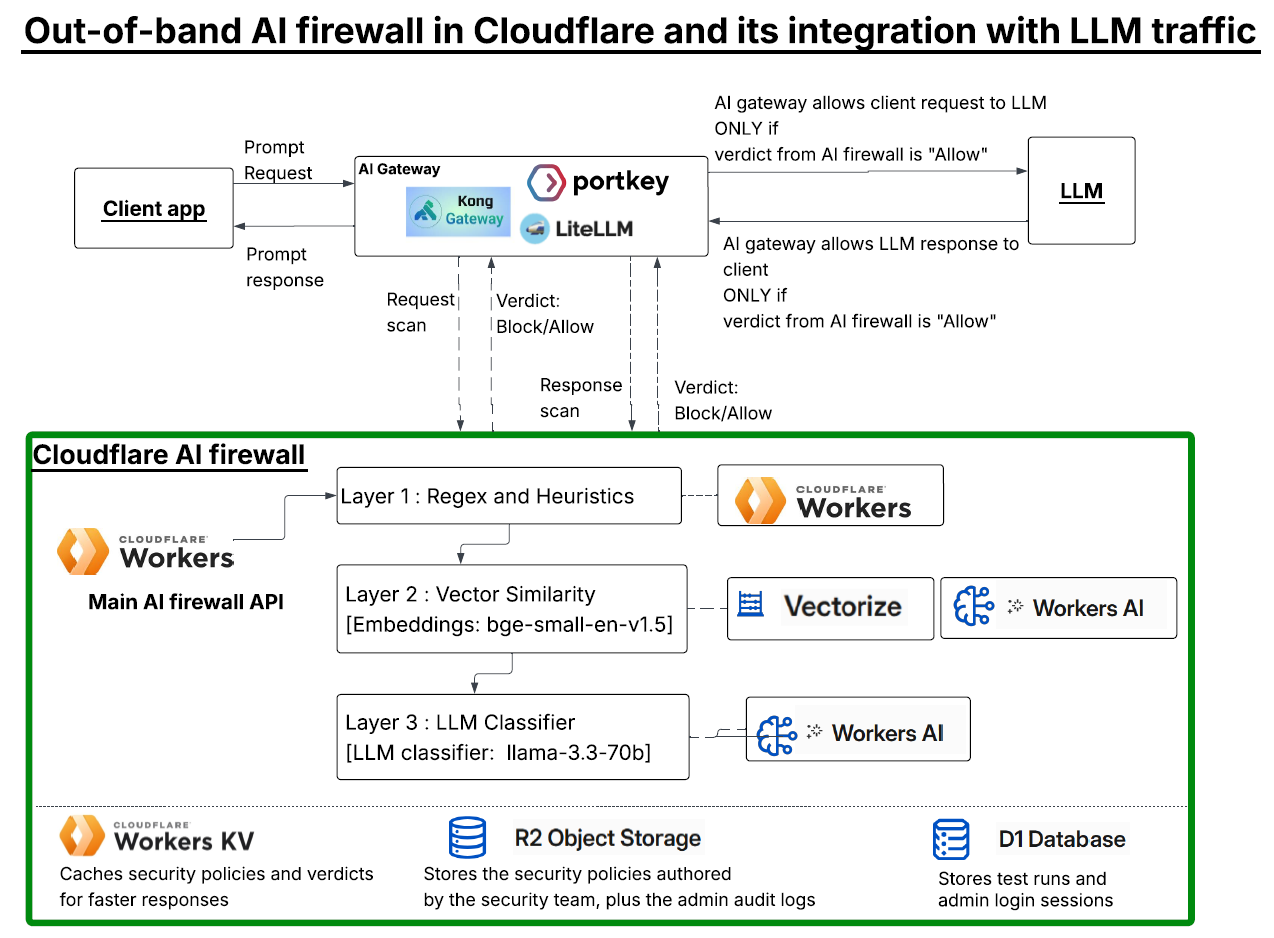
Everything runs on Cloudflare. KV for fast policy and verdict lookups, R2 for durable policy storage and audit logs, D1 for test history, .Vectorize for attack signature matching, and Workers AI to run the embedding model and the classifier. No outside services. That is the point. If a single developer can wire this together from parts Cloudflare already ships, it is a product Cloudflare could offer natively.
One firewall, one policy per app
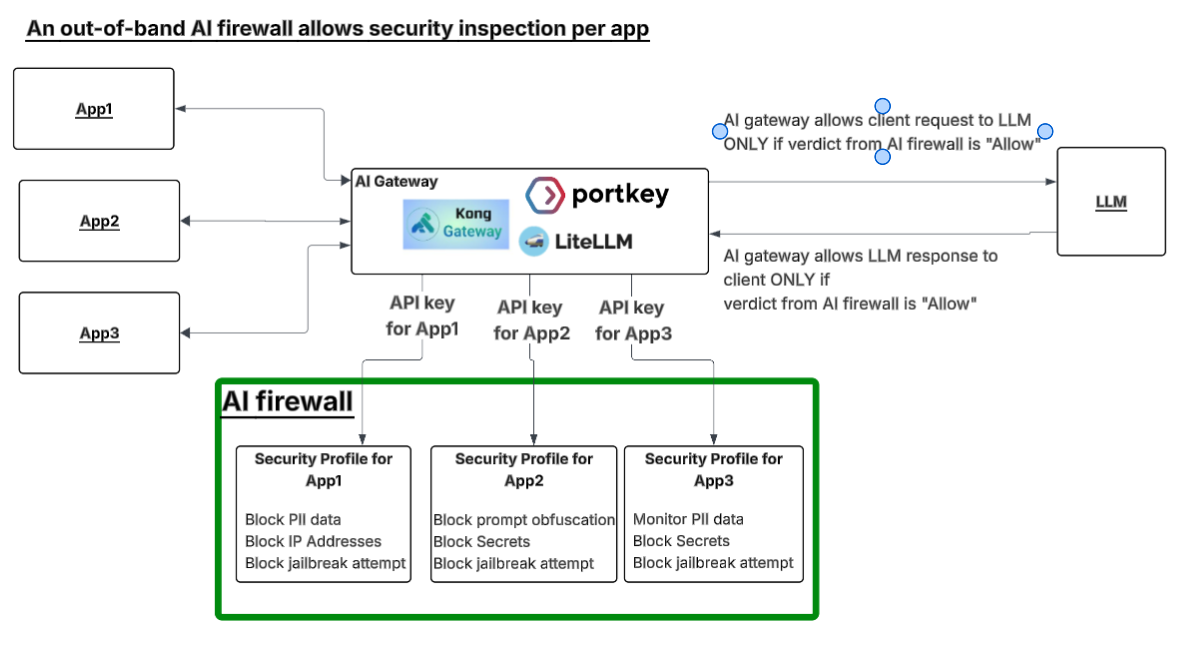
This is where the out-of-band model earns its place. Every app gets its own API key. The gateway sends that key, the firewall loads that app’s profile, and runs its policy. One endpoint, one engine, a different policy per caller.
The diagram shows three apps, three profiles, behind one gateway. App3 is the interesting one: it monitors PII instead of blocking it, so you get full visibility into PII in its prompts without stopping a single request. That is how you watch a detection before you enforce it.
Adding an app is issuing a key and attaching a profile. No new WAF rules, no new domain, no zone. Policy lives with the key, not the network path.
The detection pipeline
This is the most important part of an AI firewall. Everything else is plumbing. How well it inspects a prompt decides whether the firewall is worth running.
It does not run one big check. It runs three checks, ordered cheapest to most expensive. It stops as soon as it has an answer.
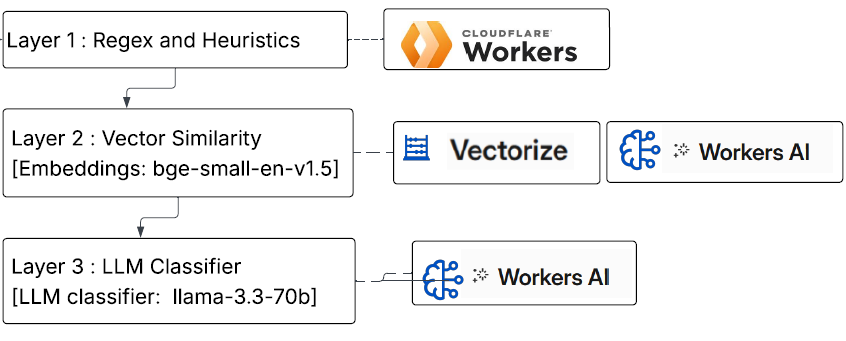
Layer 1: heuristics. Regex for known patterns: injection phrases, jailbreaks, PII, obfuscation. This runs in the Worker. There is no model call, so it is fast and runs first. Regex matches patterns, not intent. Expect some false positives. A researcher quoting an attack as an example can trip it.
Note : If this prompt was judged before, return the stored verdict. I use two tiers. The Workers Cache API comes first, since it is colocated in the same datacenter. Workers KV is the cross-region fallback. Repeat traffic resolves in milliseconds.
Layer 2: vector similarity. Attackers rarely send a known attack word for word. They reword it. I embed the prompt with bge-small-en-v1.5 on Workers AI and compare it against known attack signatures in Vectorize. A reworded injection still matches when the regex missed it.
Layer 3: the LLM. This is the expensive check. I use llama-3.3-70b-instruct-fp8-fast on Workers AI to read the prompt for meaning. It catches novel threats that match no pattern and no signature. It costs seconds, not milliseconds. So it runs last, and only when the cheaper layers cannot decide.
The value is in the overlap. Each layer catches a different kind of miss. Most threats get caught by at least one of them. None of this is 100 percent. A determined attacker will find an edge eventually. This should run as one control among others, not the only thing between a prompt and your model.
This is one approach and it works. It can be better. The layers, the thresholds, the models, all of it is worth tuning. I would rather ship something honest and keep improving it than pretend it is done.
If you find this interesting, please feel free to check out the github repo:
https://github.com/ashishmgupta/cloudflare-ai-firewall
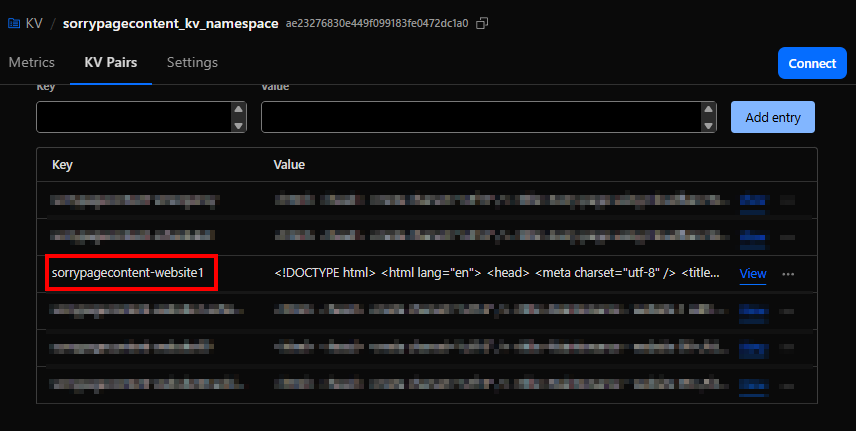
Screenshot : The policy manager